クリッピング・アタッチメント
クリッピングは演算コストが非常に高いため、慎重に使用する必要があります。詳しくはパフォーマンスの章をご覧ください。
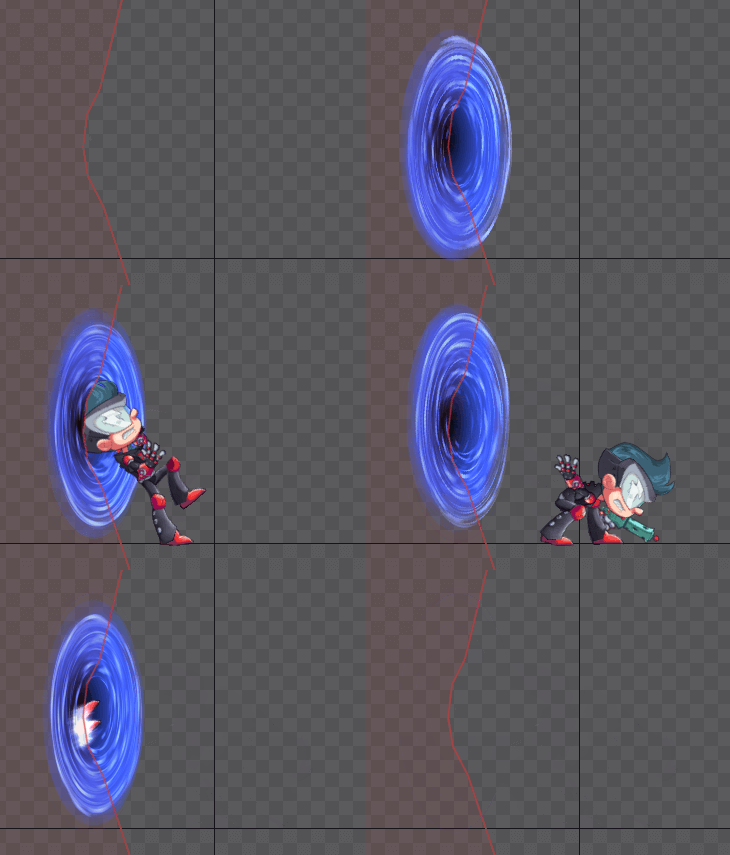
クリッピング・アタッチメントとは、領域やメッシュアタッチメントの描画を切り取るためのポリゴンのことです。

クリッピング・アタッチメントは、ウェイトを使用して、ボーンの変形時に自動的に変形させることができます。
クリッピング・アタッチメントの頂点の位置は、アニメーションでキーとして記録することができます。
使用例については、クリッピングのデモ、プロジェクト例、Tipsをご覧ください。
セットアップ
新しいクリッピングアタッチメントを作成するには、ツリー内のボーンまたはスロットを選択し、New...(新規...) Clipping(クリッピング)を選択します。

新しいクリッピング・アタッチメントがツリーに表示され、自動的に編集モードが開きます。 また、編集モードの中の新規頂点モードも自動的に選択されます。
頂点を作成し、新規頂点モードを終了した後、エンドスロットを設定する必要があります。
プロパティ

Select(選択)、Export(エクスポート)、Name(名前)、Color(カラー)、Set Parent(親設定)の各プロパティについては共通のアタッチメントプロパティをご覧ください。
エンドスロット
End slot(エンドスロット)プロパティは、クリッピングが終了するスロットを設定します。クリッピングは、クリッピング・アタッチメントのスロットから始まり、指定されたエンドスロットまでの表示順序(Draw Order)内のすべてのスロットに適用されます。(エンドスロットも含みます)
デフォルトでは、新しいクリッピング・アタッチメントのエンドスロットは、そのクリッピング・アタッチメントを含むスロットに設定されます。その結果、クリッピングは、クリッピング・アタッチメントのスロットから表示順序の最後まで(表示順序のスロットより上のすべてのスロット)に対して適用されます。クリッピングされているスロットは、ツリー内で赤くハイライトされます。

エンドスロットをgunに設定した後:

クリッピングを編集
Edit Clipping(クリッピングを編集)ボタンをクリックすると、クリッピング・アタッチメントの頂点を修正するための編集モードに切り替わります。
フリーズ
Freezeボタンは、現在の頂点の位置に対して、回転を0に、スケールを1に設定します。
これが可能なのは、クリッピング・アタッチメントは実際には回転やスケールの概念が無いからです。 クリッピング・アタッチメントにはいくつかの頂点があり、それぞれに座標を持っているだけです。Spineは、他のアタッチメントと同様の操作を可能にするために、便宜的に回転とスケールの値を提供しています。回転とスケールは、回転またはスケールツールをアタッチメント全体に使用したときに調整されます。
クリッピング・アタッチメントにはトランスレーションの概念もありません。表示されているトランスレートの値は、頂点全体の中心座標です。
編集モード
編集モードでは、クリッピング・アタッチメントの頂点を作成、変更、削除することができます。

Edit Clipping(クリッピングを編集)ボタンをクリックすると、編集モードになります。編集モードは、再度Edit Clipping(クリッピングを編集)ボタンをクリックするか、編集モードダイアログを閉じるか、スペースバーかエスケープキーを押すことでいつでも終了することができます。
右クリックで、Create(作成)とDelete(削除)の各ツールを切り替えることができます。
作成ツール
Create(作成)ツールは、クリッピング・アタッチメントのエッジに沿って、クリックで新しい頂点を作成することができます。頂点の移動はドラッグで行います。ダブルクリックすると頂点が削除されます。
削除ツール
Delete(削除)ツールは、クリックすることで頂点を削除することができます。頂点の移動はドラッグで行います。ctrl(Macではcmd)を押しながらドラッグすると、複数の頂点をボックス選択することができます。

新規頂点モード
New(新規)ボタンを押すと、すべての頂点が削除され、新規頂点モードになります。このモードでは、クリックして新しい頂点を作成することで、クリッピング・アタッチメントを定義することができます。頂点はドラッグで移動したり、ダブルクリックで削除することもできます。完了するには、最初の頂点をクリックしてポリゴンを閉じるか、再度New(新規)ボタンをクリックして新規頂点モードを終了します。

トランスフォームツール
クリッピング・アタッチメントの頂点は、編集モード外でもトランスフォームツールを使って動かせます。また、クリッピング・アタッチメント全体を他のアタッチメントと同様に回転、トランスレート、スケールすることができます。

個々の頂点も、任意のトランスフォームツールでドラッグしてトランスフォームすることができます。複数の頂点を選択するには、ctrl(Macではcmd)を押しながら、クリックまたはドラッグしてボックス選択します。選択された頂点は、スペースバーやエスケープキーを押すか、空いているスペースをクリックすることで、選択を解除することができます。

回転やスケールを行う際、原点を変更することができます。回転やスケールツールの中心にある小さな十字にマウスオーバーして円が表示されたら、原点を任意の位置にドラッグしてください。また、原点は自動的に頂点にスナップします。

設定モードでの頂点の移動は、セットアップポーズのクリッピング・アタッチメントを変更します。アニメ化モードでの頂点の移動は、変形キーを設定するために行われます。変形キーの使用は一般的に避けるべきで、代わりにウェイトを使用することを推奨しています。
回転とスケールは、頂点の移動にのみ使用されます。使用された回転とスケールの量は変形キーには保存されず、頂点の位置のみが保存されるため、変形キー間の補間では常に頂点が直線的に移動します。
表示順序
クリッピングは、クリッピングされたアタッチメントのスロットから始まり、クリッピングされたアタッチメントのエンドスロットまでの、表示順序内のすべてのスロットに適用されます。(エンドスロットも含みます)
アニメーション中にどのアタッチメントをクリッピングするかを変更するには、表示順序をキーとして記録します。
クリッピング・アタッチメントのオン/オフを切り替えるには、クリッピングアタッチメントの表示/非表示を切り替えます。アニメーションでは、スロットアタッチメントをキーにして設定します。
複数のクリッピング・アタッチメントを同時に表示することはできますが、それらがクリップするスロットが表示順序内で重なることはできません。
自己交差
クリッピング・アタッチメントのポリゴンが自己交差していると、クリッピングは正しく動作しなくなってしまいます。必ずポリゴンのエッジが交差しないようにご注意ください。
パフォーマンス
Spineランタイム内のクリッピングは、CPUを使用して実装されていますが、特に多くの頂点を持つメッシュアタッチメントを使用する場合、非常に演算コストが高くなってしまいます。クリッピングを使用するアニメーションのパフォーマンスは、常に対象のプラットフォームでご確認ください。
クリッピング・アタッチメントは、可能な限り、最小の頂点数である3つの頂点で使用してください。
クリッピングのCPU使用率を最小限にするためには、クリッピング・アタッチメントの頂点数と、クリッピングされた領域とメッシュの全アタッチメントの合計頂点数の両方を減らす必要があります。最も少ない数のアタッチメントをクリップするようにスタートスロットとエンドスロットを設定し、それらのアタッチメントを編集してそれぞれの頂点数を可能な限り減らします。なお、クリッピングポリゴンの大きさはパフォーマンスに影響しません。
さらに、クリッピングアタッチメントの頂点を凸型に配置することで、クリッピングに必要なCPU使用量を大幅に削減することができます。 これは、クリッピングアタッチメントの頂点がまず凸多角形に分解され、その後、得られた各ポリゴンがすべてのクリッピングされた領域とメッシュアタッチメントの頂点に対してチェックされるためです。
なお、クリッピング・アタッチメントのパフォーマンスは、Spineランタイムを使用する場合のみの問題で、静止画やビデオをエクスポートする際には問題となりません。
